

As a supplier of drum brake bridges, I understand the importance of safety when it comes to maintenance and removal procedures. The drum brake bridge is a critical component in a vehicle's braking system, and improper removal can lead to serious safety hazards. In this blog post, I will outline the essential safety precautions to take when removing a drum brake bridge.
Pre - removal Safety Checks
Before you even begin the process of removing the drum brake bridge, there are several crucial safety checks that you should perform.
Vehicle Preparation
First, ensure that the vehicle is parked on a flat, stable surface. Engage the parking brake and place wheel chocks in front of and behind the wheels that are not being worked on. This prevents the vehicle from rolling during the removal process, which could cause serious injury.

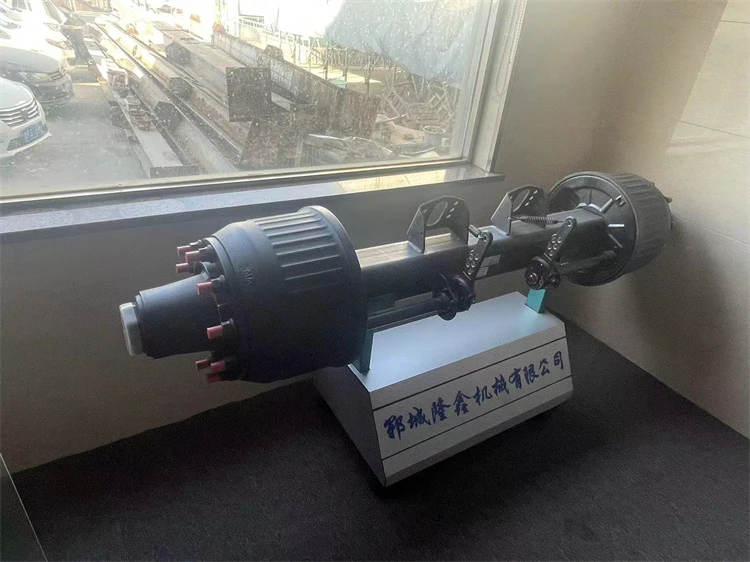
Gather the Right Tools
Having the correct tools is essential for a safe removal. You will need a jack and jack stands, wrenches, a brake spoon, and a clean, dry workspace. Make sure all tools are in good working condition and are the appropriate size for the bolts and nuts on the drum brake bridge.
Wear Protective Gear
Wear safety glasses to protect your eyes from debris, gloves to prevent cuts and burns, and a dust mask if there is a risk of asbestos dust. Although modern brake systems rarely use asbestos, older vehicles may still have asbestos - lined brake components.
Disconnecting the Battery
Before starting any work on the braking system, disconnect the vehicle's battery. This prevents any electrical short - circuits or accidental activation of the brake system during the removal process. Locate the battery in the vehicle and use a wrench to loosen the negative terminal connection. Remove the cable from the terminal and secure it away from the battery to prevent it from accidentally re - connecting.
Relieving Brake Fluid Pressure
The braking system is a hydraulic system, and there is pressure in the brake lines. To relieve this pressure, you can use a brake bleeder valve. Locate the bleeder valve on the brake caliper or wheel cylinder, depending on the type of drum brake system. Place a container under the bleeder valve to catch any brake fluid that may be released. Use a wrench to loosen the bleeder valve slightly, allowing the brake fluid to escape slowly. Once the pressure is relieved, tighten the bleeder valve.
Removing the Wheels
Use a lug wrench to loosen the lug nuts on the wheel that is associated with the drum brake bridge you are removing. Do not remove the lug nuts completely at this stage. Then, use a jack to lift the vehicle until the wheel is a few inches off the ground. Place jack stands under the vehicle's frame or designated lifting points for added stability. Once the vehicle is secure on the jack stands, remove the lug nuts and the wheel.
Inspecting the Brake Components
Before removing the drum brake bridge, inspect the brake components for any signs of damage or wear. Check the brake shoes, springs, and hardware for cracks, breaks, or excessive wear. If any components are damaged, they should be replaced before reassembling the braking system.
Removing the Drum Brake Bridge
Detach the Brake Lines
Locate the brake lines that are connected to the drum brake bridge. Use a line wrench to loosen the fittings that connect the brake lines to the bridge. Be careful not to damage the brake lines during this process. Once the fittings are loose, carefully remove the brake lines from the bridge.
Remove the Mounting Bolts
The drum brake bridge is typically held in place by several mounting bolts. Use a socket wrench to remove these bolts. Keep the bolts in a safe place, as you will need them when reassembling the brake system.
Carefully Remove the Bridge
Once the mounting bolts and brake lines are removed, carefully lift the drum brake bridge out of the vehicle. Be aware that the bridge may be heavy, so use proper lifting techniques to avoid straining your back or dropping the bridge.
Post - removal Safety Precautions
Store the Components Properly
After removing the drum brake bridge, store it in a clean, dry place. Protect it from dust, moisture, and physical damage. If you are planning to reuse the bridge, clean it thoroughly and inspect it for any hidden damage.
Clean the Workspace
Clean up any brake fluid spills immediately. Brake fluid is corrosive and can damage the vehicle's paint and other components. Use a clean cloth and a suitable cleaning agent to remove the brake fluid.
Reassemble with Care
When it is time to reassemble the braking system, follow the manufacturer's instructions carefully. Make sure all components are installed correctly and tightened to the proper torque specifications.
Conclusion
Removing a drum brake bridge is a complex task that requires careful attention to safety. By following these safety precautions, you can minimize the risk of injury and ensure that the braking system is properly maintained. At our company, we offer high - quality drum brake bridges that are designed to meet the strictest safety standards. If you are in need of a link text: Hydraulic Steering Axle, a link text: High Quality German Axle, or a link text: Disc - Brake Axle, we have the products you need. Contact us today to discuss your procurement needs and let us help you find the best solutions for your vehicles.
References
- Automotive Brake Systems Manual, General Motors Corporation
- Brake Safety Guidelines, National Highway Traffic Safety Administration
- Vehicle Maintenance Handbook, Ford Motor Company


